How to Export H264 in .MOV QuickTime from Adobe Premiere Pro, Media Encoder and After Effects
May 15th, 2020
Full tutorial on how to export H.264 MOV in Premiere Pro, Media Encoder and After Effects using our plugin, AfterCodecs
Table of Contents
Introduction to AfterCodecs
AfterCodecs is a new native plugin for the whole Adobe CC Video suite, it supports many codecs for
.MOV containers and is compatible with MacOS and Windows. One such codec is H.264. This article will show you how to export a H.264 .mov file, which is impossible to do in regular Premiere Pro.Although Quicktime support ended in 2016/2018 for Windows/MacOS, the
.MOV video container is still very commonplace in the industry, with many places still asking for .MOV files on delivery. Because of this, the format will be supported by most NLEs for years to come. Since it is still so common, having more codec options when exporting .MOV files in Premiere can save you a lot of hassle.How to Export H264 in .MOV QuickTime from Adobe Premiere Pro and Media Encoder
In Premiere Pro, select the sequence you would like to export and go to File > Export > Media, this will open your export settings.
In Media Encoder, once you have a sequence queued for export, click on the button in the Format column to open your export settings.
From this point onwards, the process is exactly the same for both applications.
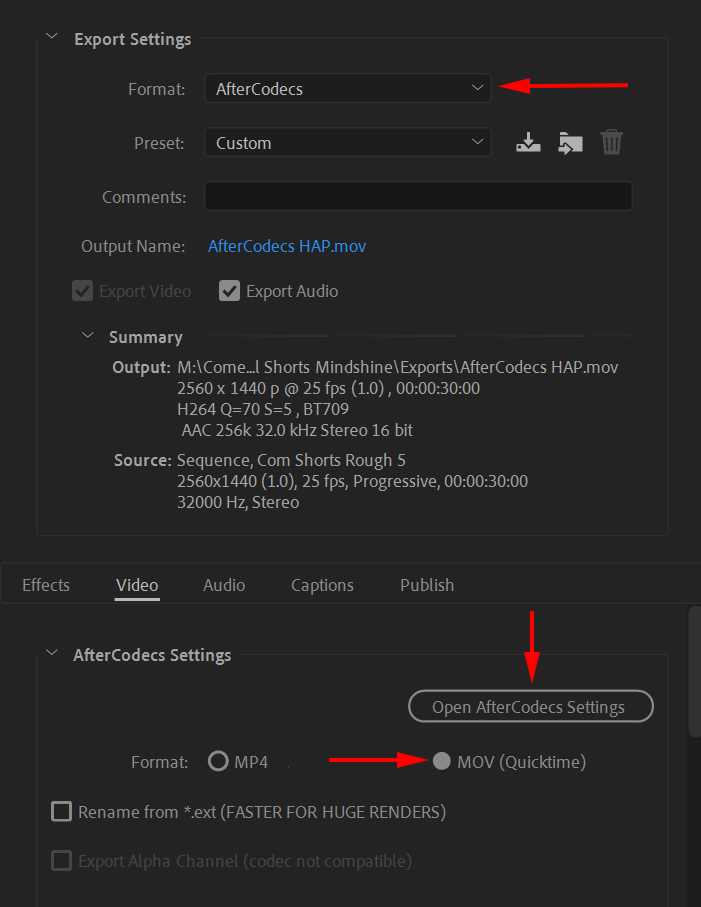
Select AfterCodecs in the Format drop-down menu, then, under the Video tab, select the MOV format.
Click on Open AfterCodecs Settings
Selecting your AfterCodecs settings
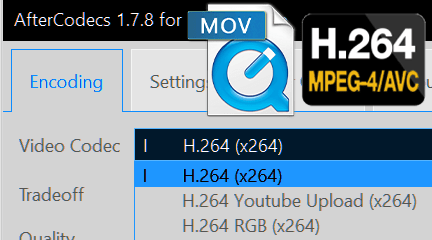
In the Video Codec drop-down, select one of the
H.264 variants: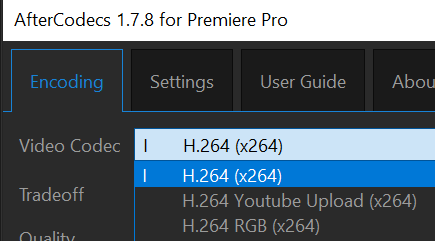
- is the normal option of the codec.
H.264 - is the AfterCodecs preset that follows the recommended Youtube export specifications. This is the simplest profile to use, as it only has a render speed slider. Speed = 8 should be avoided for final uploads, as it will produce low quality files that are only acceptable for quick previews.
H.264 Youtube Upload - is for power users only. Do not use it if you don't know what you're doing.
H.264 RGB - you can follow the same tutorial here to export in H.265, a more advanced codec compared to H.264, leading to better quality or lower file size, if you can afford to spend more time compressing the file.
H.265
The AfterCodecs menu also offers a wide range of export settings for this codec.
So that the export suits your needs, you can toggle between three main “trade-offs” when choosing your settings: Quality, Bitrate and FileSize.
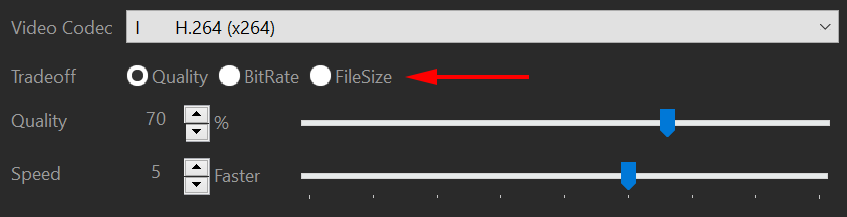
- Quality:If you would like to maintain a constant quality standard throughout the video. A quality between 80-90% is excellent, so there is no need to go above that. An extreme quality of 99 or 100 may result in an unplayable file, depending on where you are trying to play it.
- Bitrate:If you would like to maintain a specific bitrate throughout the video, which can be at the expense of quality.
- FileSize:If you have specific size requirements, this option will give you the best quality file for that size.
Speed affects compression optimization, meaning lower render speeds will result in smaller files, and faster speeds will result in larger files. However, if you choose Bitrate or FileSize, the algorithm will also compromise file quality to get your render out faster. Speed = 8 should be only be used for quick previews, as it will produce low quality files. As a general rule, with slower render speeds, you will get smaller files of higher quality.
As you can see, each of the options has a slider which will affect that specific parameter, so choose the one that works best for you.
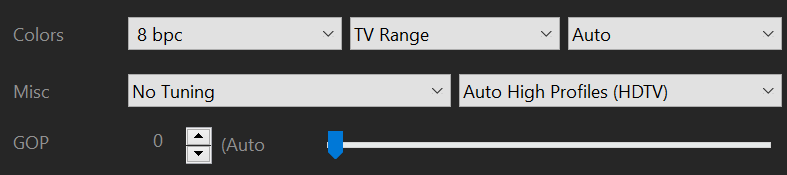
There are also more advanced settings that make changes to color range and the video processing algorithm. Remember that if you would like more information about any AfterCodecs settings, you can simply hover over it with your cursor, and an explanation will pop up on the right. Changing these settings without knowing what they do may create an export that is unplayable on some software/players.
Under the Audio Codec options, if you choose AAC, a slider that lets you select the bitrate will appear.

Higher quality bitrate will encode slower, and lower quality ones encode faster.
At the bottom of the Encoding tab, you will see a feature called Fast Start. This is an AfterCodecs feature that optimizes your video for web streaming. It will allow your video to start playing quicker online, and it also means Youtube will process it faster, making it available sooner after uploading.

Once everything is configured to your liking, click OK on the AfterCodecs panel.
As an added bonus, AfterCodecs has many more
H.264 audio options than regular Premiere, including multitrack export, regardless of if you are exporting .MP4 or .MOV. These can be found in the Audio tab of the Premiere export menu.
Once you have selected all your settings, click Export in PrPro or the play button in AME and you’re done!
How to Export H264 in .MOV QuickTime from Adobe After Effects
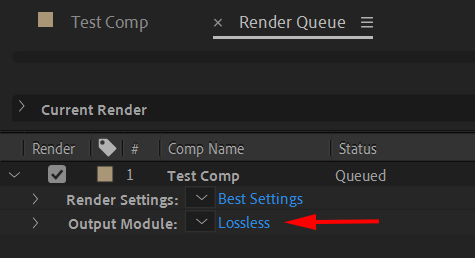
First, add your composition to the After Effects render queue.
In the Render Queue tab, click on the button shown on the right to bring up your output module settings.
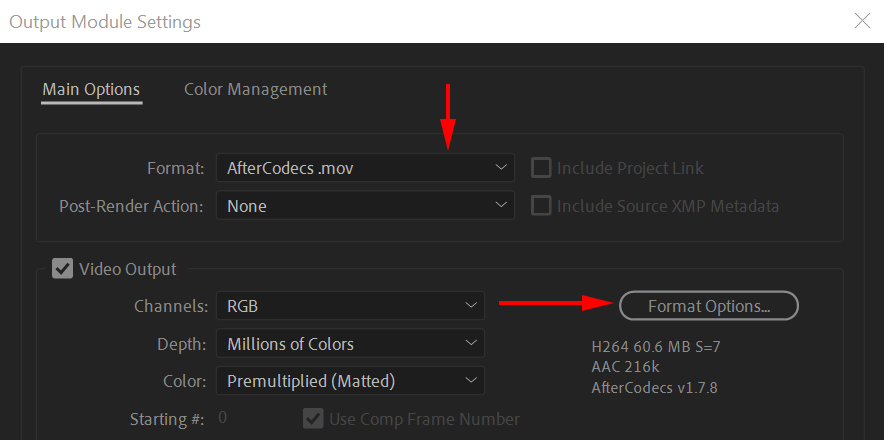
Select AfterCodecs .mov from the Format drop-down menu and click on Format Options to open the AfterCodecs settings.
For all information required on setting up your export, please refer to “Selecting your AfterCodecs settings” earlier in this article.
Once everything is configured to your liking, click OK on the AfterCodecs settings menu and on the Output Module settings.
Click Render in the After Effects queue and you’re done!
The BRAW Studio Panel BRAW Settings tab
Our V2 update of BRAW Studio introduces a new tab of our panel to let you color grade in a more efficient way and with batch modifications to a selection of .BRAW !
Read more
BRAW Studio for After Effects is available now
Learn the basics of color grading Blackmagic RAW (.braw) in After Effects !
Read more
PlumePack Options Explained
What are the PlumePack options ? You should get all information here !
Read more
PlumePack your Project with Proxies
How you can use PlumePack if you are working with Proxies in your project !
Read more
BRAW Studio Version 3 Upgrade
Learn about the new features of BRAW Studio V3 and the upgrading process
Read more
BRAW Studio App: A New Powerful Tool for BRAW Files
Details about the new BRAW Studio App: a BRAW Player where you can edit Settings, trim and more!
Read more
Fast Color Correct with the BRAW Studio White Balance Picker
Indicate the white/grey part in your BRAW image to set automatically Color Temperature and Tint accordingly !
Read more