Batch Export Multiple Clips from the same Sequence in Premiere Pro and After Effects
September 21st, 2019
Tired of exporting parts of your timeline in multiple clips from Premiere Pro and After Effects, having to set up output settings one by one ? Here's the solution for you.
Table of Contents
AfterCodecs, our Adobe CC Exporter plugin, has a new
MultiRender
feature that will help you export multiple clips from the same sequence quickly. It means you'll only need to click Export and configure codecs parameters once
, which is a huge save of your precious time. It also means that once you have a particular timeline set up, going through this process again (for example when you've done some changes and need newer versions of your videos) will be even easier.Another benefit of this new method is that there's
no room for errors of misconfigured codecs output settings
between the different files; you are guaranteed they will be the same.The trick we use for now is to put all clips you want to export on the same timeline and create markers to tell AfterCodecs (the Exporter plugin you're going to use) what portions of the timeline you want to export. It works if you already have the clips directly on your timeline (no need to create another sequence from clips if they're already there). If you need to export multiple timelines, you can create a new sequence containing those sequences and follow the same procedure.
In fact, you can render whatever part of the timeline you want, not necessarily only clips. Let's say you have the following timeline in Premiere Pro:
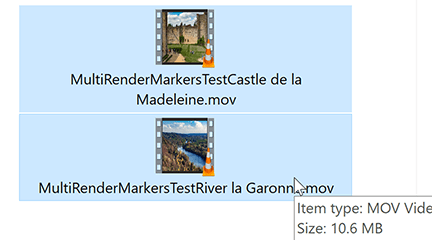
After using our MultiRender feature, you would have rendered those files (Screenshot on Windows Explorer but it also works for MacOS) if your output file was
MultiRenderMarkersTest.mov:Now that you know you want to learn how to use this feature, here's a tutorial for Premiere Pro / Media Encoder and After Effects with screenshots :
MultiRender feature on Adobe Premiere Pro and Media Encoder
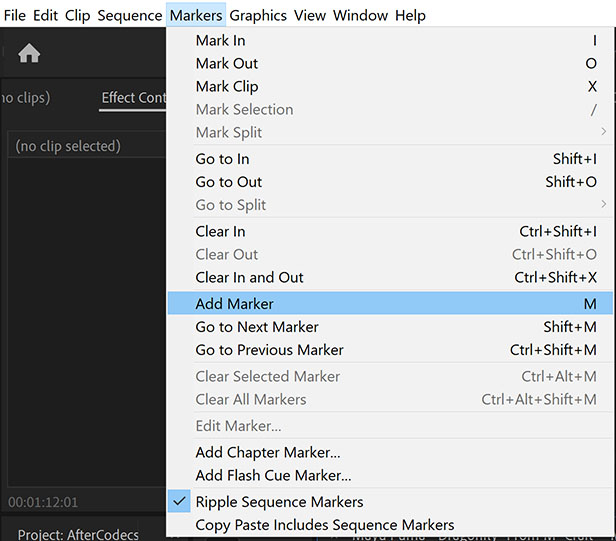
So all you need to do is to create new markers, as shown on this screenshot :
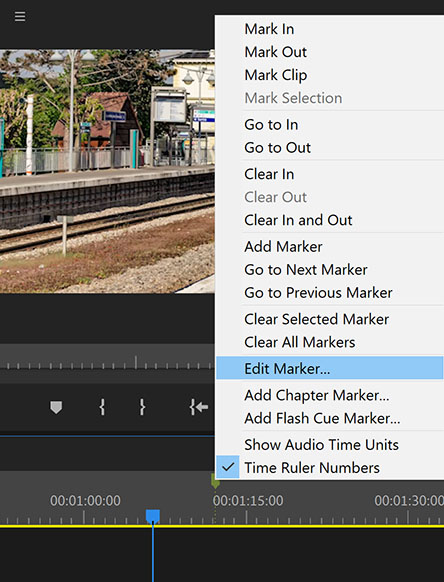
Then you need to right-click on a created marker and choose Edit Marker, to be able to increase the marker's duration and write in its Comments box:
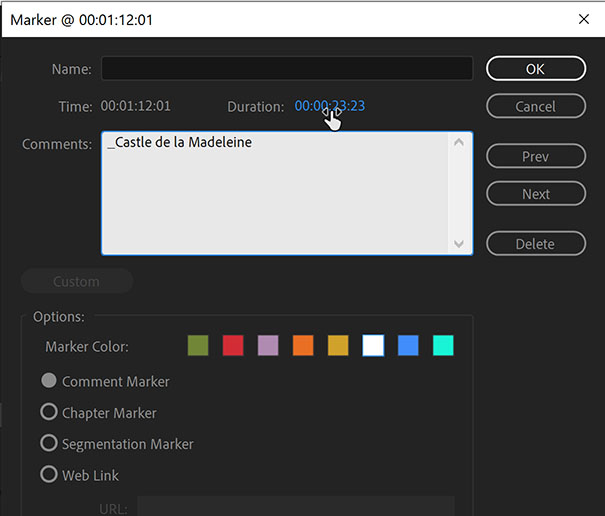
You should edit your markers' Comments section and prefix them with an underscore
_, to tell AfterCodecs this is a marker that should be used by MultiRender. Whatever is written after the underscore will be appended to the filename you choose for the exported files. The beginnings and endings of your markers indicate to AfterCodecs the in and out points
of the clips which are to be exported. Now your timeline should look like this:After having AfterCodecs correctly installed and licensed (please use AfterCodecs free 500 frames trial to test it before buying it!), you are ready to export. Go to File > Export > Media and select AfterCodecs in the Format drop-down list. Then click on the AfterCodecs Settings button and tick the MultiRender checkbox. Now you're good to go!
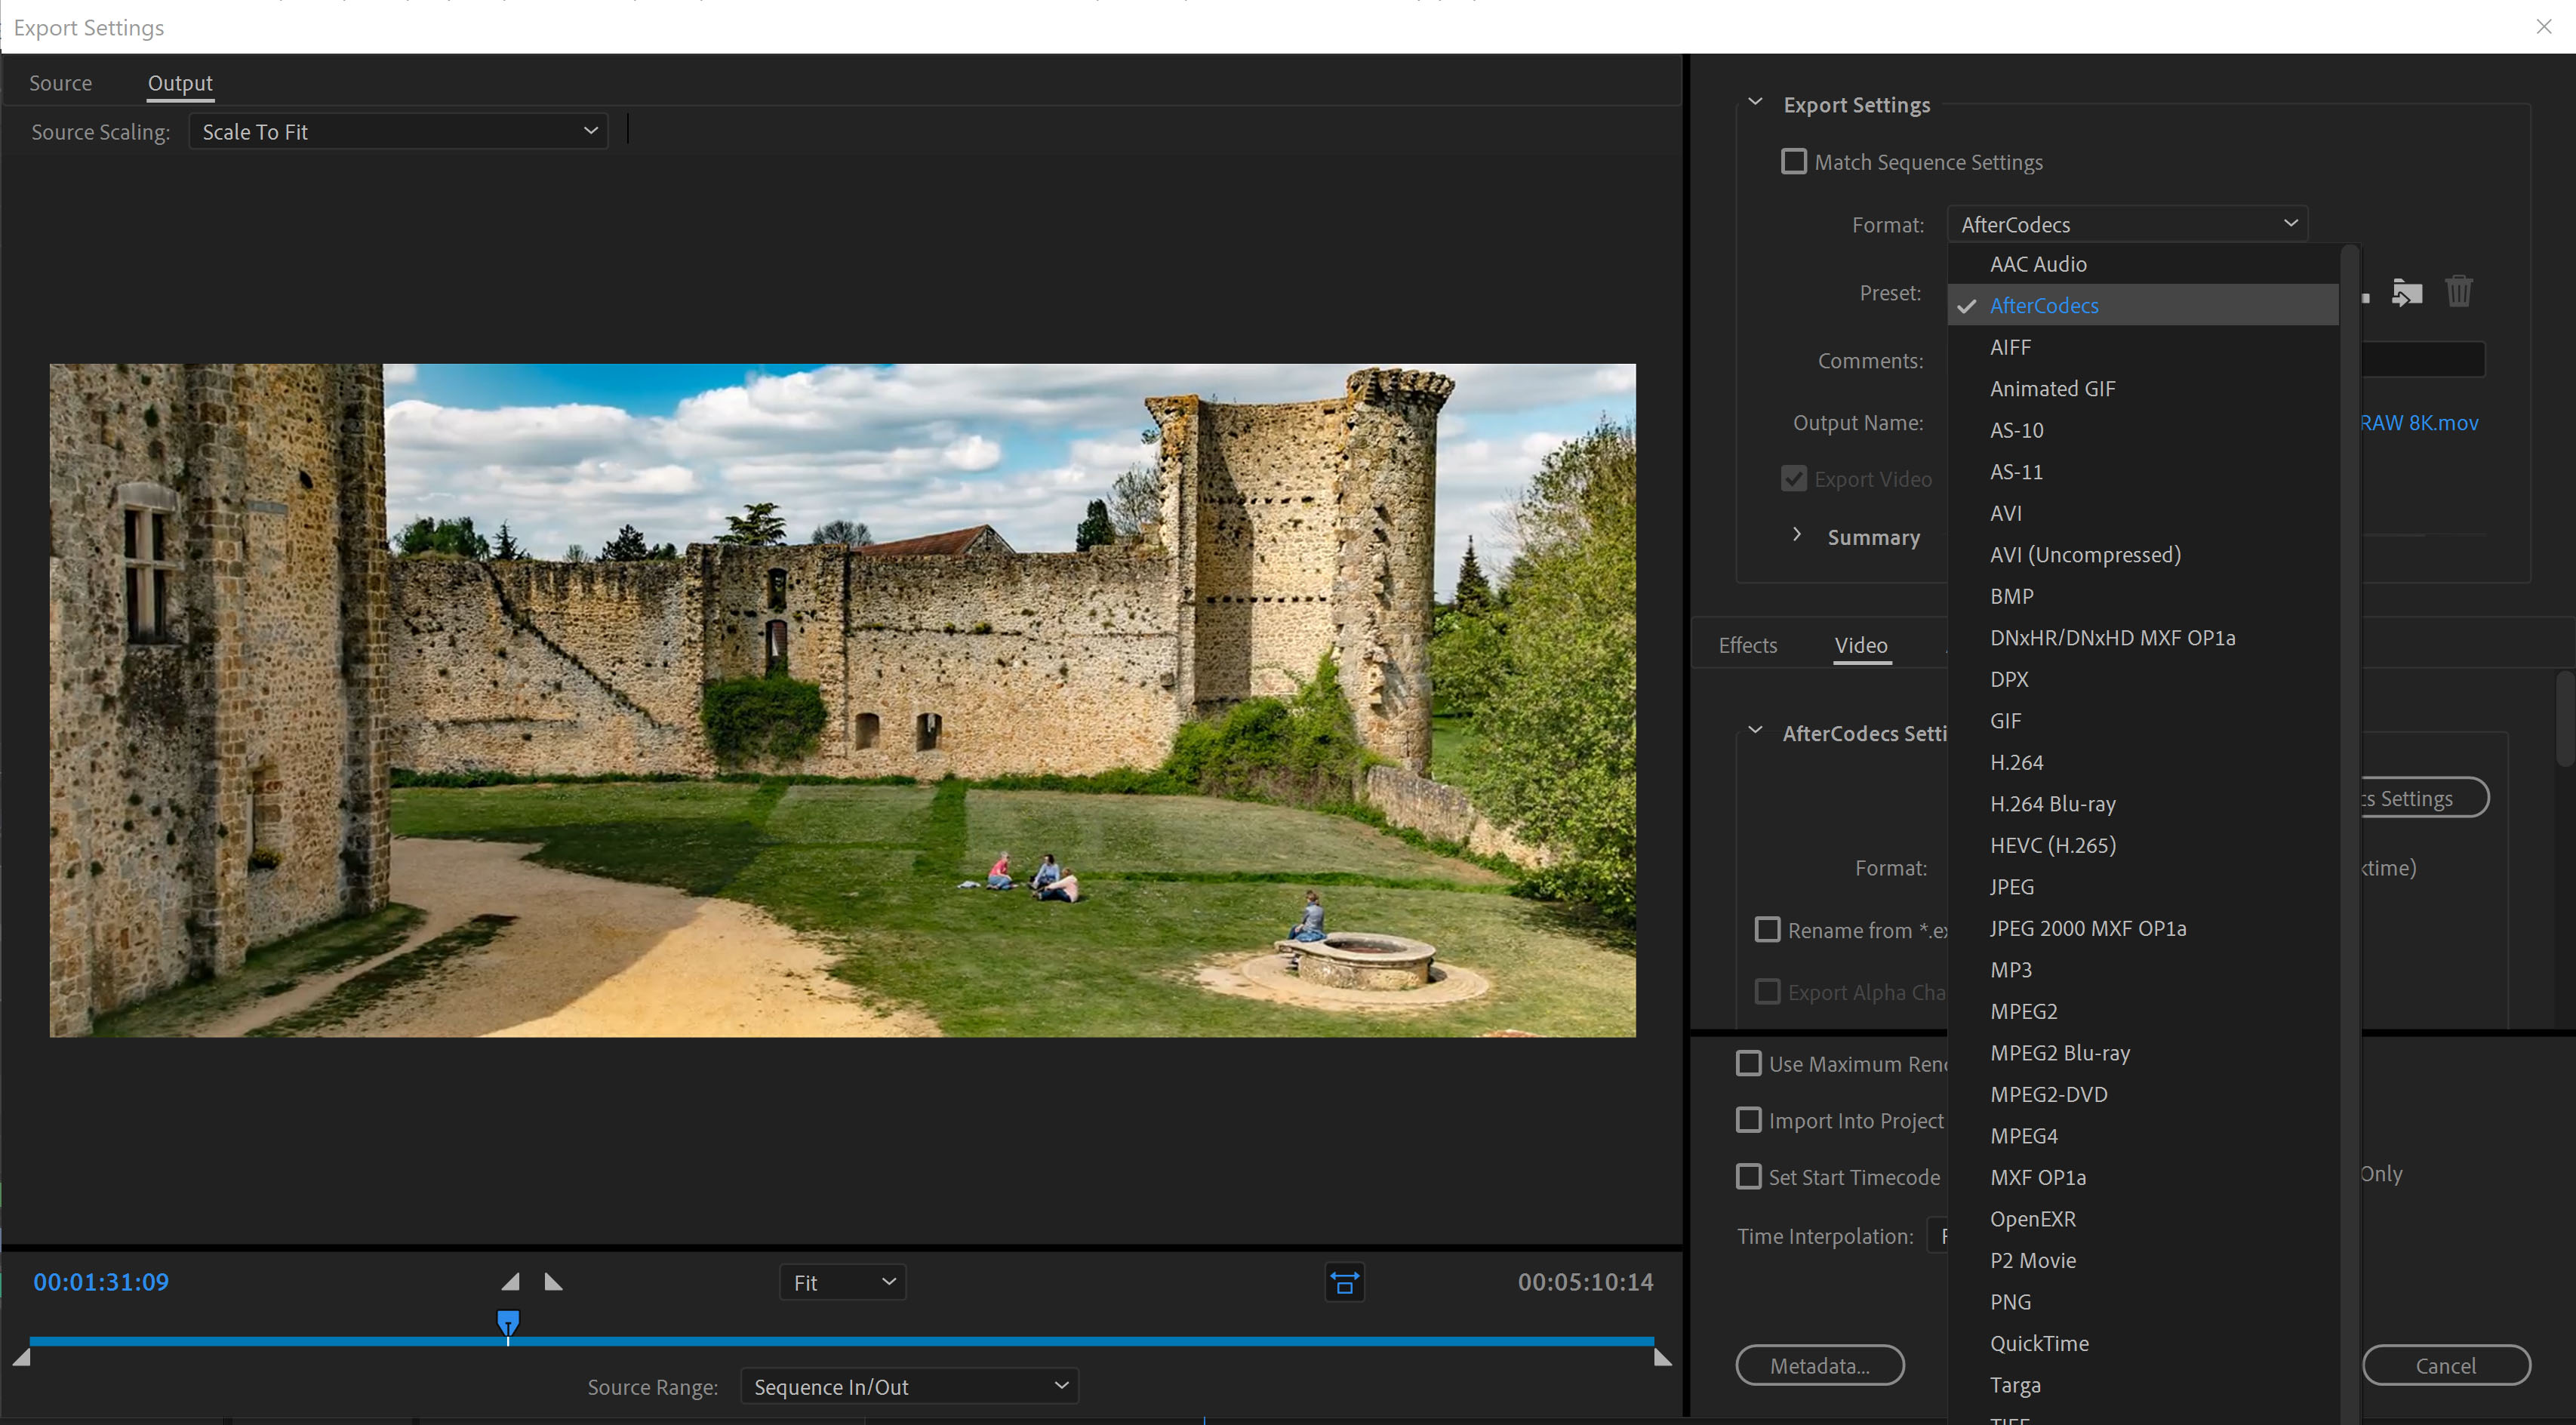
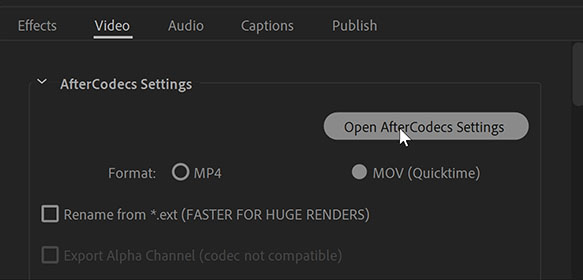
The final result is there in your target output folder:
MultiRender feature on Adobe After Effects
You can already use this feature on After Effects if you just export your composition to Adobe Media Encoder's Render Queue. It works the same way. Your timeline / composition should look like this :
As with Premiere Pro, you need to edit the marker's duration before being able to drag and drop its ins and outs. Then simply prefix any marker you wish to include for MultiRender with an underscore character _.
Rendering through Media Encoder can be a bit slower sometimes, but you can do it while you are using After Effects, in the background.
This feature hasn't been done directly from inside After Effects yet, but if you need it, please contact us ! AfterCodecs also exists for After Effects, this might be doable, but we need more info about your specific needs.
I don't like having to manually create the markers !
Yes, we know, that's why we created a panel to automatically create and delete them in Premiere Pro ! See our new blog post about it for more information: Batch Export All Clips Quickly from Premiere Pro with our Panel
Happy editing !
The BRAW Studio Panel BRAW Settings tab
Our V2 update of BRAW Studio introduces a new tab of our panel to let you color grade in a more efficient way and with batch modifications to a selection of .BRAW !
Read more
PlumePack Options Explained
What are the PlumePack options ? You should get all information here !
Read more
PlumePack your Project with Proxies
How you can use PlumePack if you are working with Proxies in your project !
Read more
BRAW Studio Version 3 Upgrade
Learn about the new features of BRAW Studio V3 and the upgrading process
Read more
BRAW Studio App: A New Powerful Tool for BRAW Files
Details about the new BRAW Studio App: a BRAW Player where you can edit Settings, trim and more!
Read more
Fast Color Correct with the BRAW Studio White Balance Picker
Indicate the white/grey part in your BRAW image to set automatically Color Temperature and Tint accordingly !
Read more
Apply your Custom LUT directly to BRAW
BRAW Studio now lets you apply your own custom LUT, processed through the official Blackmagic RAW SDK like an Embedded LUT ! Here is a quick tutorial to do so
Read more